XBee For Arduino And Raspberry Pi
Step 2: A simple example Arduino Example You should be able to get two Arduino boards with XBee shields talking to each other without any configuration, using just the standard Arduino serial commands. To upload a sketch to an Arduino board with a XBee shield, you'll need to put both jumpers on the shield to the 'USB' setting (i.e. Place them on the two pins closest to the edge of the board) or remove them completely (but be sure not to lose them!). Then, you can upload a sketch normally from the Arduino environment.
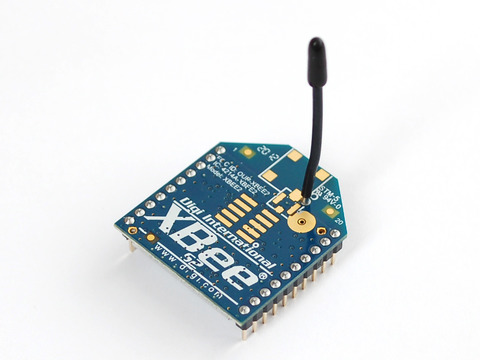
Recently I was doing some experiments to establish a wireless communication between a Raspberry pi and Arduino. To establish wireless communication I used XBee Pro Series 2 from Digi International.The idea behind this test setup is to test, whether I can control devices like motor or read different sensors remotely. We produce IoT shields for raspberry pi and arduino. Cellular IoT application, NB-IoT, 3G-4G/LTE, GSM/GPRS, XBee Shields, NB-IoT Evaluation, Wireless Sensor Network Dev. Board and And Antennas. Lets Check Out Our Products.
Acer ring software update. Acer Ring Software Download. 1/11/2018 0 Comments. View docs - without the software Acer Ring imports documents easily and seamlessly. And, it can view all PDF, Word, PowerPoint.txt and.epub files, even if you don't have the relevant software on your device. Re: Acer Iconia Pau30 Ring Software Post by Detective » Thu Feb 21, 2013 5:54 am Below you can download acer iconia pau30 ring software driver for Windows. Checking and Updating Your Firmware Question: What is firmware and why is it important to keep it updated? Answer: Firmware is a software program embedded into your Ring device that keeps it functioning properly. Acer Ring update for Acer Iconia A20x/A21x/A51x/A70x series tablet. Tags: acer ring, acer ring 下载, acer ring 下載, acer ring ダウンロード, acer ring update, acer ring下载, papel de parede acer, acer ring descargar, acer ring software. Acer Ring is a program that comes preinstalled on most Acer touchscreen devices that run on Windows 8. An Acer Ring icon will be visible on the Desktop screen of a device that has it installed. The program launches instantly and displays all of your favorite documents, videos, photos, apps.
In this case, upload the Communication Physical Pixel sketch to one of the boards. This sketch instructs the board to turn on the LED attached to pin 13 whenever it receives an 'H' over its serial connection, and turn the LED off when it gets an 'L'. You can test it by connecting to the board with the Arduino serial monitor (be sure it's set at 9600 baud), typing an H, and pressing enter (or clicking send). The LED should turn on.
Send an L and the LED should turn off. Sivapuranam in tamil pdf free. If nothing happens, you may have an Arduino board that doesn't have a built-in LED on pin 13.
Once you've uploaded the Physical Pixel sketch and made sure that it's working, unplug the first Arduino board from the computer. Switch the jumpers to the XBee setting (i.e. Place each on the center pin and the pin farthest from the edge of the board).
Now, you need to upload a sketch to the other board. Make sure its jumpers are in the USB setting. Then upload the following sketch to the board. Step 3: Addressing There are multiple parameters that need to be configured correctly for two modules to talk to each other (although with the default settings, all modules should be able to talk to each other). They need to be on the same network, as set by the ID parameter (see 'Configuration' below for more details on the parameters). The modules need to be on the same channel, as set by the CH parameter.
Finally, a module's destination address (DH and DL parameters) determine which modules on its network and channel will receive the data it transmits. This can happen in a few ways: • If a module's DH is 0 and its DL is less than 0xFFFF (i.e. 16 bits), data transmitted by that module will be received by any module whose 16-bit address MY parameter equals DL. • If DH is 0 and DL equals 0xFFFF, the module's transmissions will be received by all modules. • If DH is non-zero or DL is greater than 0xFFFF, the transmission will only be received by the module whose serial number equals the transmitting module's destination address (i.e. Whose SH equals the transmitting module's DH and whose SL equals its DL ).
Again, this address matching will only happen between modules on the same network and channel. If two modules are on different networks or channels, they can't communicate regardless of their addresses.
Step 4: Configuring the XBee module You can configure the XBee module from code running on the Arduino board, on Raspberry Pi, or from software on the computer. To configure it from the Arduino board, you'll need to have the jumpers in the XBee position. To configure it from the computer, you'll need to have the jumpers in the USB configuration and have removed the microncontroller from your Arduino board. To get the module into configuration mode, you need to send it three plus signs: +++ and there needs to be at least one second before and after during which you send no other character to the module. Note that this includes newlines or carriage return characters. Thus, if you're trying to configure the module from the computer, you need to make sure your terminal software is configured to send characters as you type them, without waiting for you to press enter.
Otherwise, it will send the plus signs immediately followed by a newline (i.e. You won't get the needed one second delay after the +++).
If you successfully enter configuration mode, the module will send back the two characters 'OK', followed by a carriage return. Send Command Expected Response +++ OK Once in configuration mode, you can send AT commands to the module. Command strings have the form ATxx (where xx is the name of a setting). To read the current value of the setting, send the command string followed by a carriage return. To write a new value to the setting, send the command string, immediately followed by the new setting (with no spaces or newlines in-between), followed by a carriage return.